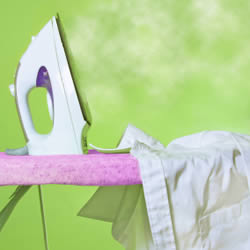
How to Iron a Shirt like a Pro
If the prospect of ironing a shirt has you bewildered, just follow these instructions and before you know it you’ll have a perfectly ironed one that would make your mama proud.
The first thing to do is choose a well-lighted area with a clean floor to set up the ironing board. In other words, you don’t want to be ironing next to the dog dish where you might accidentally drag a sleeve through. Place the ironing board so that the wide end is to your right, if you’re right handed, and near an electrical plug. Most ironing boards are adjustable for height. Set yours so that it is about waist level for you.
If the shirt you will be ironing is linen or is very wrinkled from the wash, spray the shirt lightly with water using a spray bottle. Roll the shirt up and wrap it in a towel for five to ten minutes. This will allow the moisture to distribute evenly. You want it to be only slightly damp when you iron it.
Fill the water reservoir of your iron to the full line with cool water. Some irons recommend distilled water, which is a good idea if your tap water is hard. Minerals from the water will build up in the iron over time and cause the steam function not to work properly. Also a mineral buildup can cause the iron to spit and even leave rust-like stains on your garments.
Plug in the iron and set the temperature gauge to the setting specified for the fabric of your shirt. If you’re unsure, check the label on the shirt. Set the iron on its end point up or on a stand while it heats and during ironing when you need both hands to adjust the garment on the ironing board. Set the iron on the square end of the ironing board.
When the iron is hot, turn on the steam feature. Unroll the damp shirt and face the ironing board with the square end and the iron to your right. Hold the shirt by the collar right side of the shirt facing you and spread the collar out on the ironing board. You will be ironing the underside of the collar first. Press the collar from the point edges to the middle. Turn the collar over and press the other side in the same way. Sometimes the collar will have “ease” that allows it to be smooth when it is curved around your neck. Ironing the collar toward the center will prevent you from ironing the extra “ease” fabric into a little crease where the collar is topstitched. If you notice “ease” fabric, just let it run in front of your iron to the center without making a crease. If you like, you can fold the collar down as it will be worn and lightly press it so that the fold is more distinct and the collar lies flatter against your neck.
Next take the shirt and pull it onto the tapered end of the ironing board so that the back yoke is flat on the board and the board extends a little into one sleeve. Press half of the yoke. Turn the shirt around and place it on the board so that the un-ironed half of the yoke is on the board. Smooth the yoke out with your hands so that it is flat and then press it with the iron. If the entire yoke will lie flat, you can iron it without changing its position.
Sleeves can be a little tricky, but the secret is to take your time and be sure the fabric is flat with no big wrinkles before you apply the iron. First flatten one cuff on the ironing board and iron it. Then take that sleeve by the seam and lay the whole sleeve flat on the ironing board. If you can see the crease on the top of the sleeve from previous ironing, try to match it again so that you have a single crease line on the sleeve. Start at the top where the sleeve is sewn onto the shirt and work your way down to the cuff. The placket may need to be held with your free hand as you iron it, but be careful not to burn your fingers. The steam coming out of the iron can be scalding. Turn the sleeve over and iron the other side. Repeat the process with the other sleeve.

Now you’re ready to iron the body of the shirt. With the collar to your left, place the left side of the shirt on your ironing board. On a man’s shirt, this will be the side with the buttonholes. It may be easier to iron the upper portion by turning the shirt slightly so that the tapered part of the ironing board slips into the sleeve a little. Iron around the collar carefully as it is easy to cause a wrinkle here. Pull the shirt flat on the ironing board again and iron the placket and the rest of the front left side. Rotate the shirt toward you so that half of the back is on the ironing board. Smooth it out with your hands and iron it. Keep rotating, smoothing, and ironing until you come to the right front of the shirt. Iron the top section first then the rest of it.
You can now put it on a hanger. Make sure it is hanging straight and that the sleeves are flat and folded softly toward the front. Buttoning the collar button and the first button or two will help the shirt keep its shape. Button the collar buttons on button-down shirts. Hang it in the closet with space around it so that other clothes do not crush your freshly ironed shirt.
Nine Tips for Professional Results:
- Make sure your iron is hot enough for your fabric but not hotter. A too cool iron will not remove all the wrinkles, and one that is too hot can scorch or otherwise damage your fabric. Delicate fabrics may need to be ironed using a press cloth. A clean white flour-sack dishtowel will work.
- Use spray starch for extra crispness, but be aware that a heavily starched shirt may wrinkle more when worn and be uncomfortable as well. Use a light touch with spray starch for best results.
- Take your time. Hurrying can cause you to make mistakes.
- Keep a spray bottle of water handy. If you accidentally iron in a big wrinkle, lightly spray it with water, wait a minute or so and iron the area again.
- Keep the iron moving every few seconds when it’s on the fabric. You don’t want to scorch or burn a hole in your shirt.
- Don’t press a shirt that is not clean. Ironing a stain may set it in.
- Use the tip of the iron to work around buttons and the placket on the sleeves.
- When you’re finished ironing, empty the water from your iron while the iron is hot. This will reduce the moisture that remains in the water compartment. Allow the iron to cool before you put it away.
- Keep your ironing board pad clean and in good condition. Damage to the pad may transfer to your garments.
By Linda Nelson
©2005 garmentcare.info. All Rights Reserved.
- How to Protect and Clean Suede Garments and Shoes
- A Dozen Clothing Care Tips that Will Save You Money
- Ten Stubborn Stains and How to Remove Them
- Five Tips on Preparing Your Laundry for Washing and Drying
- Wool Garment Care
- How to Iron a Shirt like a Pro
- Major Solutions for Minor Dilemmas
- Cotton Garment Care
- Clothing Storage Tips
- Seven Tried and True Laundry Products that Make Your Life Easier
|
NABOU |
NABOU Arcade |
NABOU Celebrities |
NABOU Book Reviews |
NABOU Mail |
NABOU News Celebrities Pictures | Entertainment Forum | Cocktail Recipes | eBooks Cube | Terrorism Files | For Women Only | Fine Art © 2005-2018 Nabou.com, Inc. All rights reserved. | about us | advertise | link to us | privacy policy | terms of use |